Computer-Controlled Machining
This week’s task was about exploring mechanical and machine design. I wanted to create something practical and personal, so I decided to design a multi-level tool organizer box. something I could use in the lab to keep all my tools neat and accessible.
Description of group assignment
-
Complete your lab’s safety training
-
Test runout, alignment, fixturing, speeds, feeds, materials and toolpaths for your machine
-
Document your work to the group work page and reflect on your individual page what you learned
-
Make (design+mill+assemble) something big
Goup assignment
Individual assignments
Group assignment
In this week's CNC Machining Group Assignment, we began by completing the lab's safety training, which covered essential procedures and proper use of equipment. As a team, we tested our CNC machine for spindle runout, bed alignment, and fixturing. We also experimented with different materials, speeds, and feeds to observe cutting performance. This process helped us understand how to prepare toolpaths, select the right cutting parameters, and ensure safe and precise operation. More details are available on our group documentation page.
Individual assignment
Designing in SolidWorks
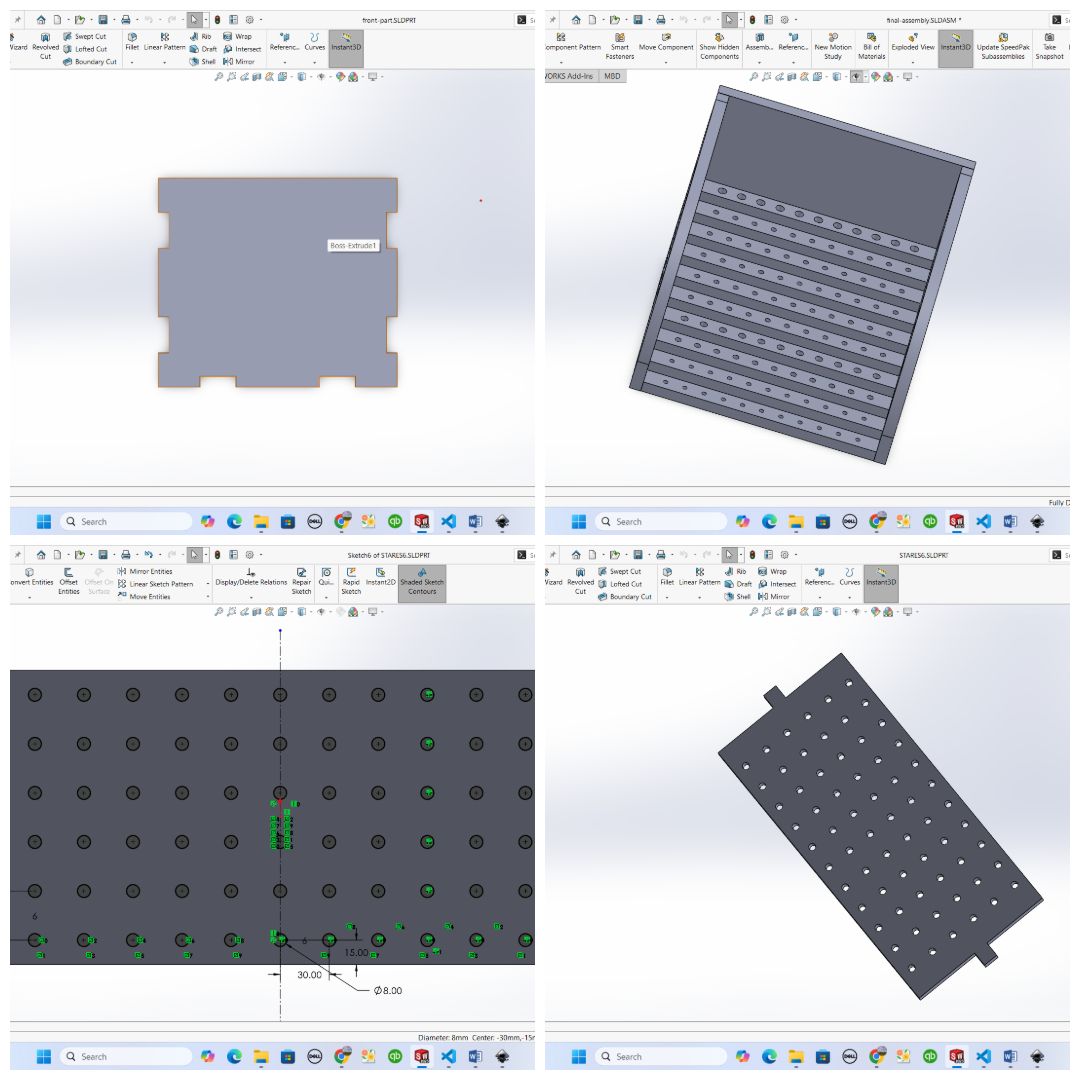
I started with SolidWorks, my favorite CAD tool. My goal was to build a stepped tool holder with holes to keep tools upright. I used extruded bosses to create the steps and cut-extrudes for the evenly spaced holes. The rounded side panels were designed using spline profiles that I extruded upward to give a modern, clean shape.
One design decision I made was to curve the side walls—not only for aesthetics but also to make the structure more rigid and ergonomic. I used mirror and pattern features to replicate holes and steps quickly, keeping the geometry consistent.
Preparing the Files in VCarve
After exporting my DXF profiles from SolidWorks, I moved into VCarve to prepare the files for the ShopBot CNC machine. I used the toolpath setup features in VCarve to assign depths and tool diameters, ensuring that I’d get clean edges without overcutting.
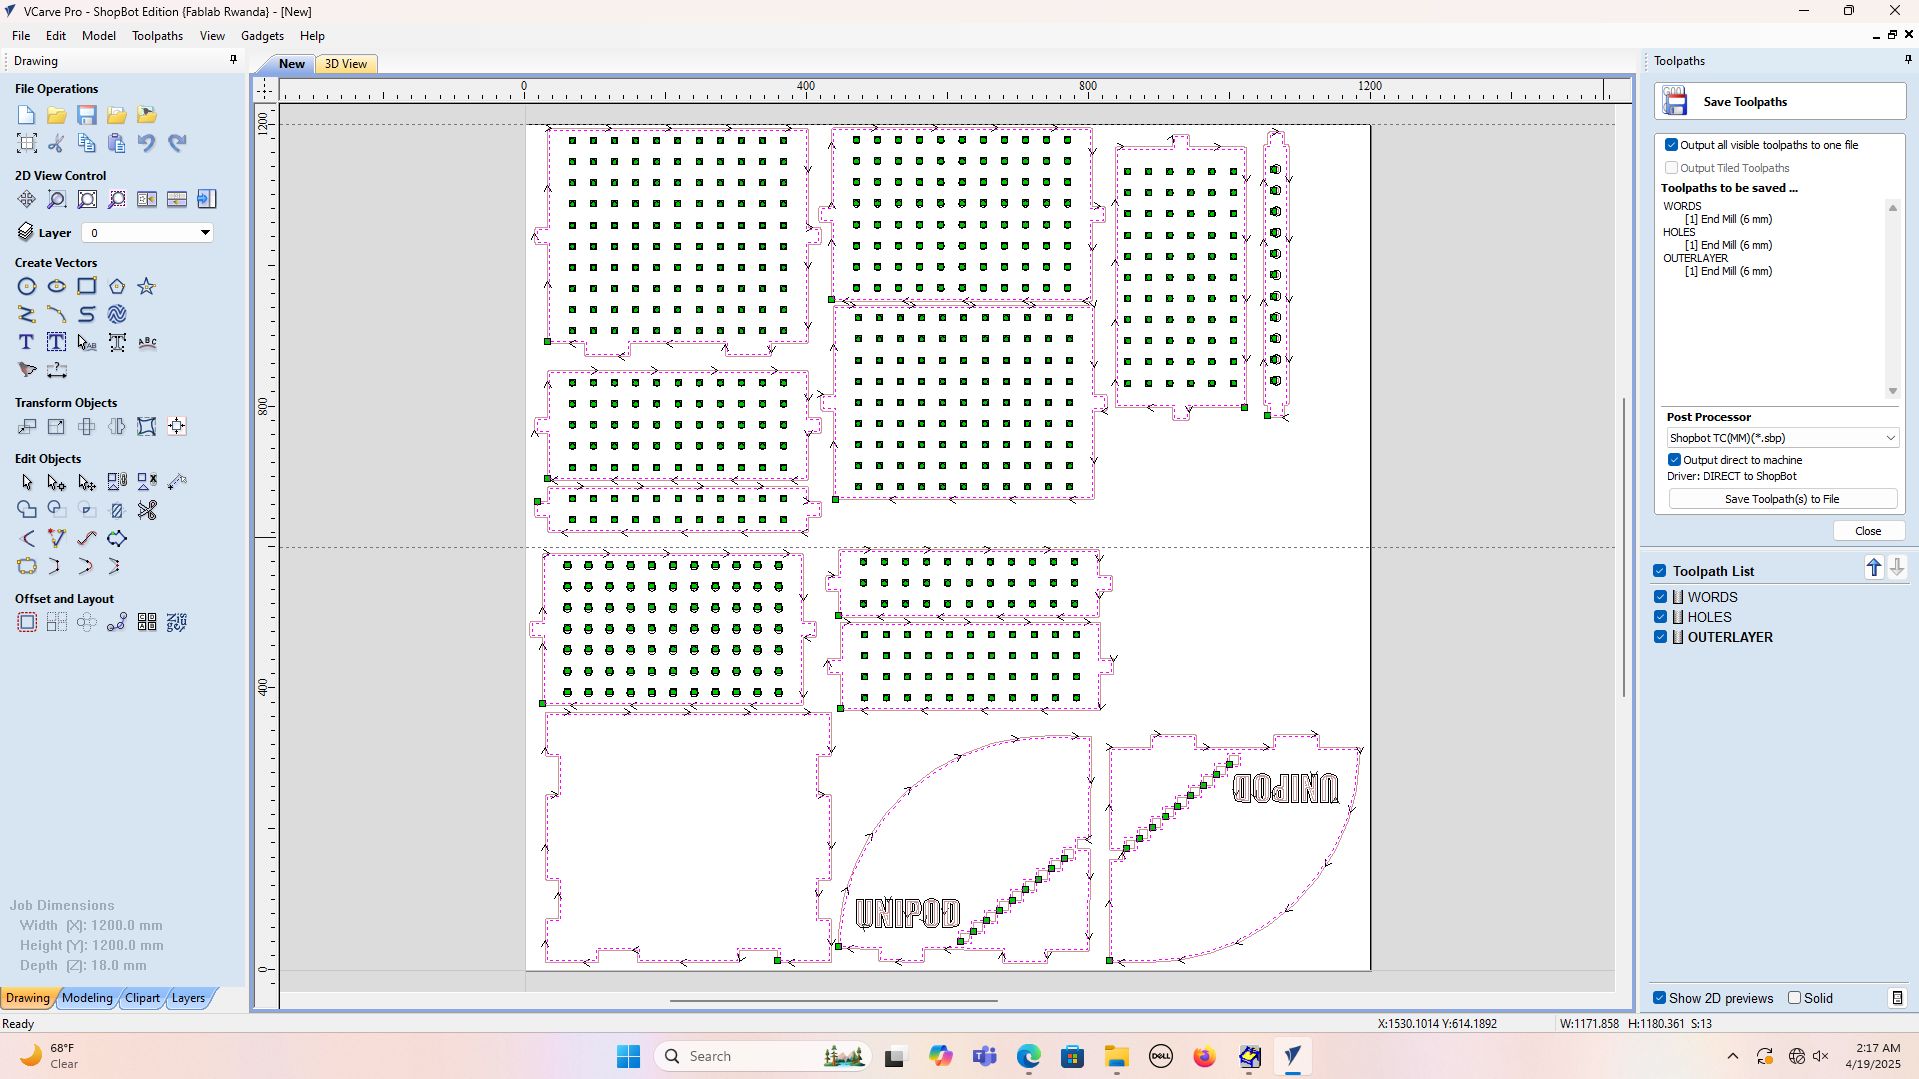
from v-carve I was able to make toolpath for maching and here is the flow of how I did it
For the material, I used MDF, which is perfect for quick prototyping and easy to cut. I nested all the parts in the VCarve software to optimize material usage before sending it to the ShopBot.
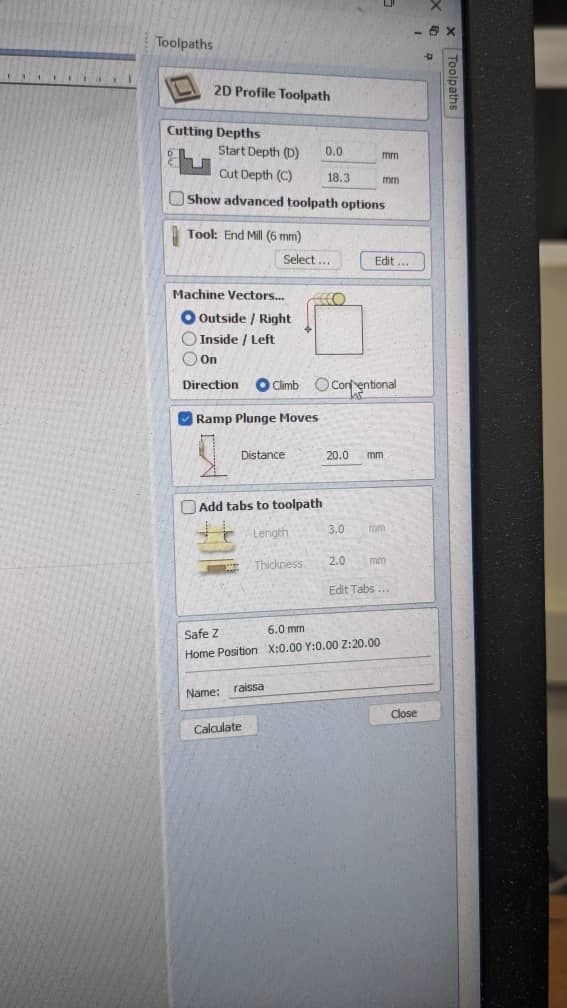
how I set the toolpath
on this stage I should set how the machine would behave while printing where I interacted with toolpath operations which state the behavior and the tool you are going to use while printing and it is where I set the passes and tabs with ramp plunge
Cut Depth: Sets how deep the tool cuts into the material.

Tool: Selects the cutter type, size, and settings.

Machine Vector: Chooses toolpath direction (inside, outside, or on the line).

Ramp Plunge Moves: Makes the tool enter the material gradually to reduce stress.

Tabs: Small bridges that hold parts in place during cutting.
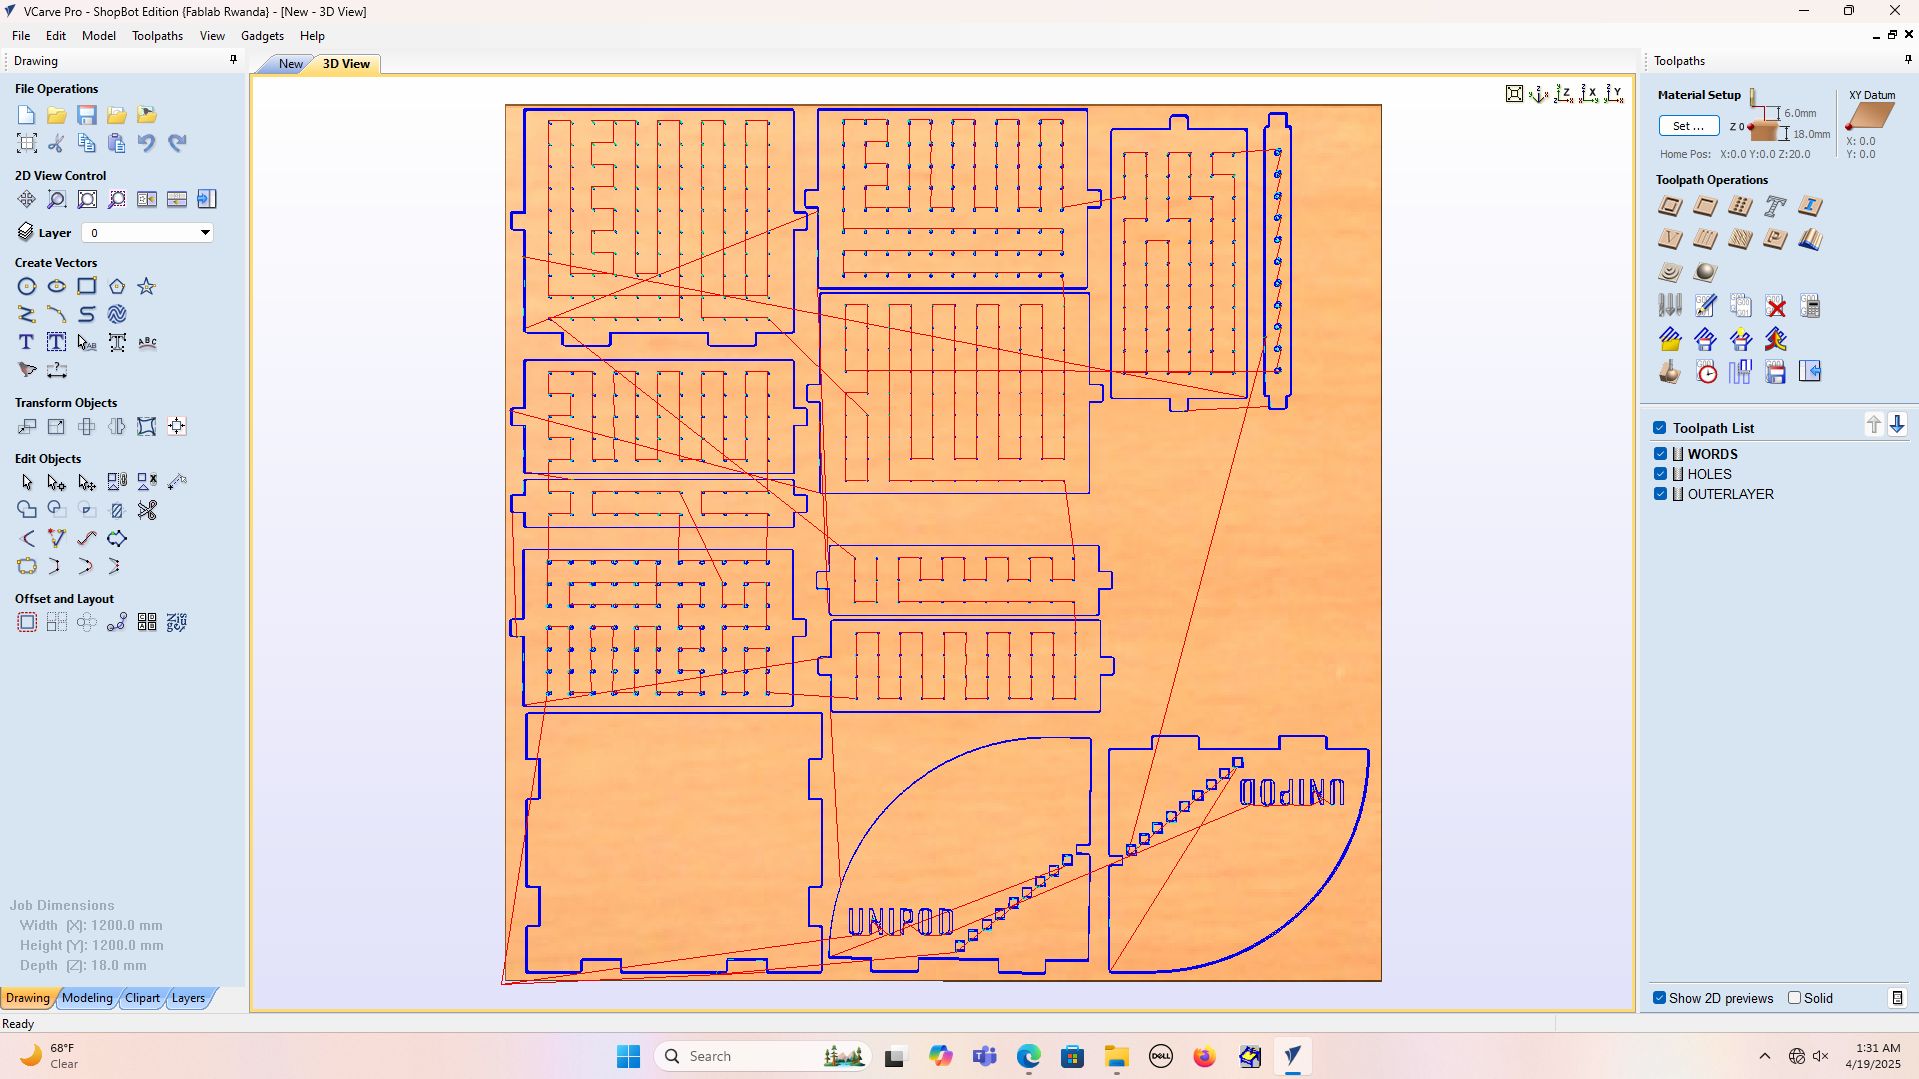
after setting the toolpath and configuring it, I clicked on calculate tool path and I got the 3D simulation of my toolpath
Machining with the ShopBot (5-axis)
Using the ShopBot CNC was exciting! I learned how to zero the axis, configure the spindle speed, and supervise the cutting process. I used tabs in the VCarve toolpath to hold parts in place and prevent kickbacks.

here is the video while cutting the paths on the work piece
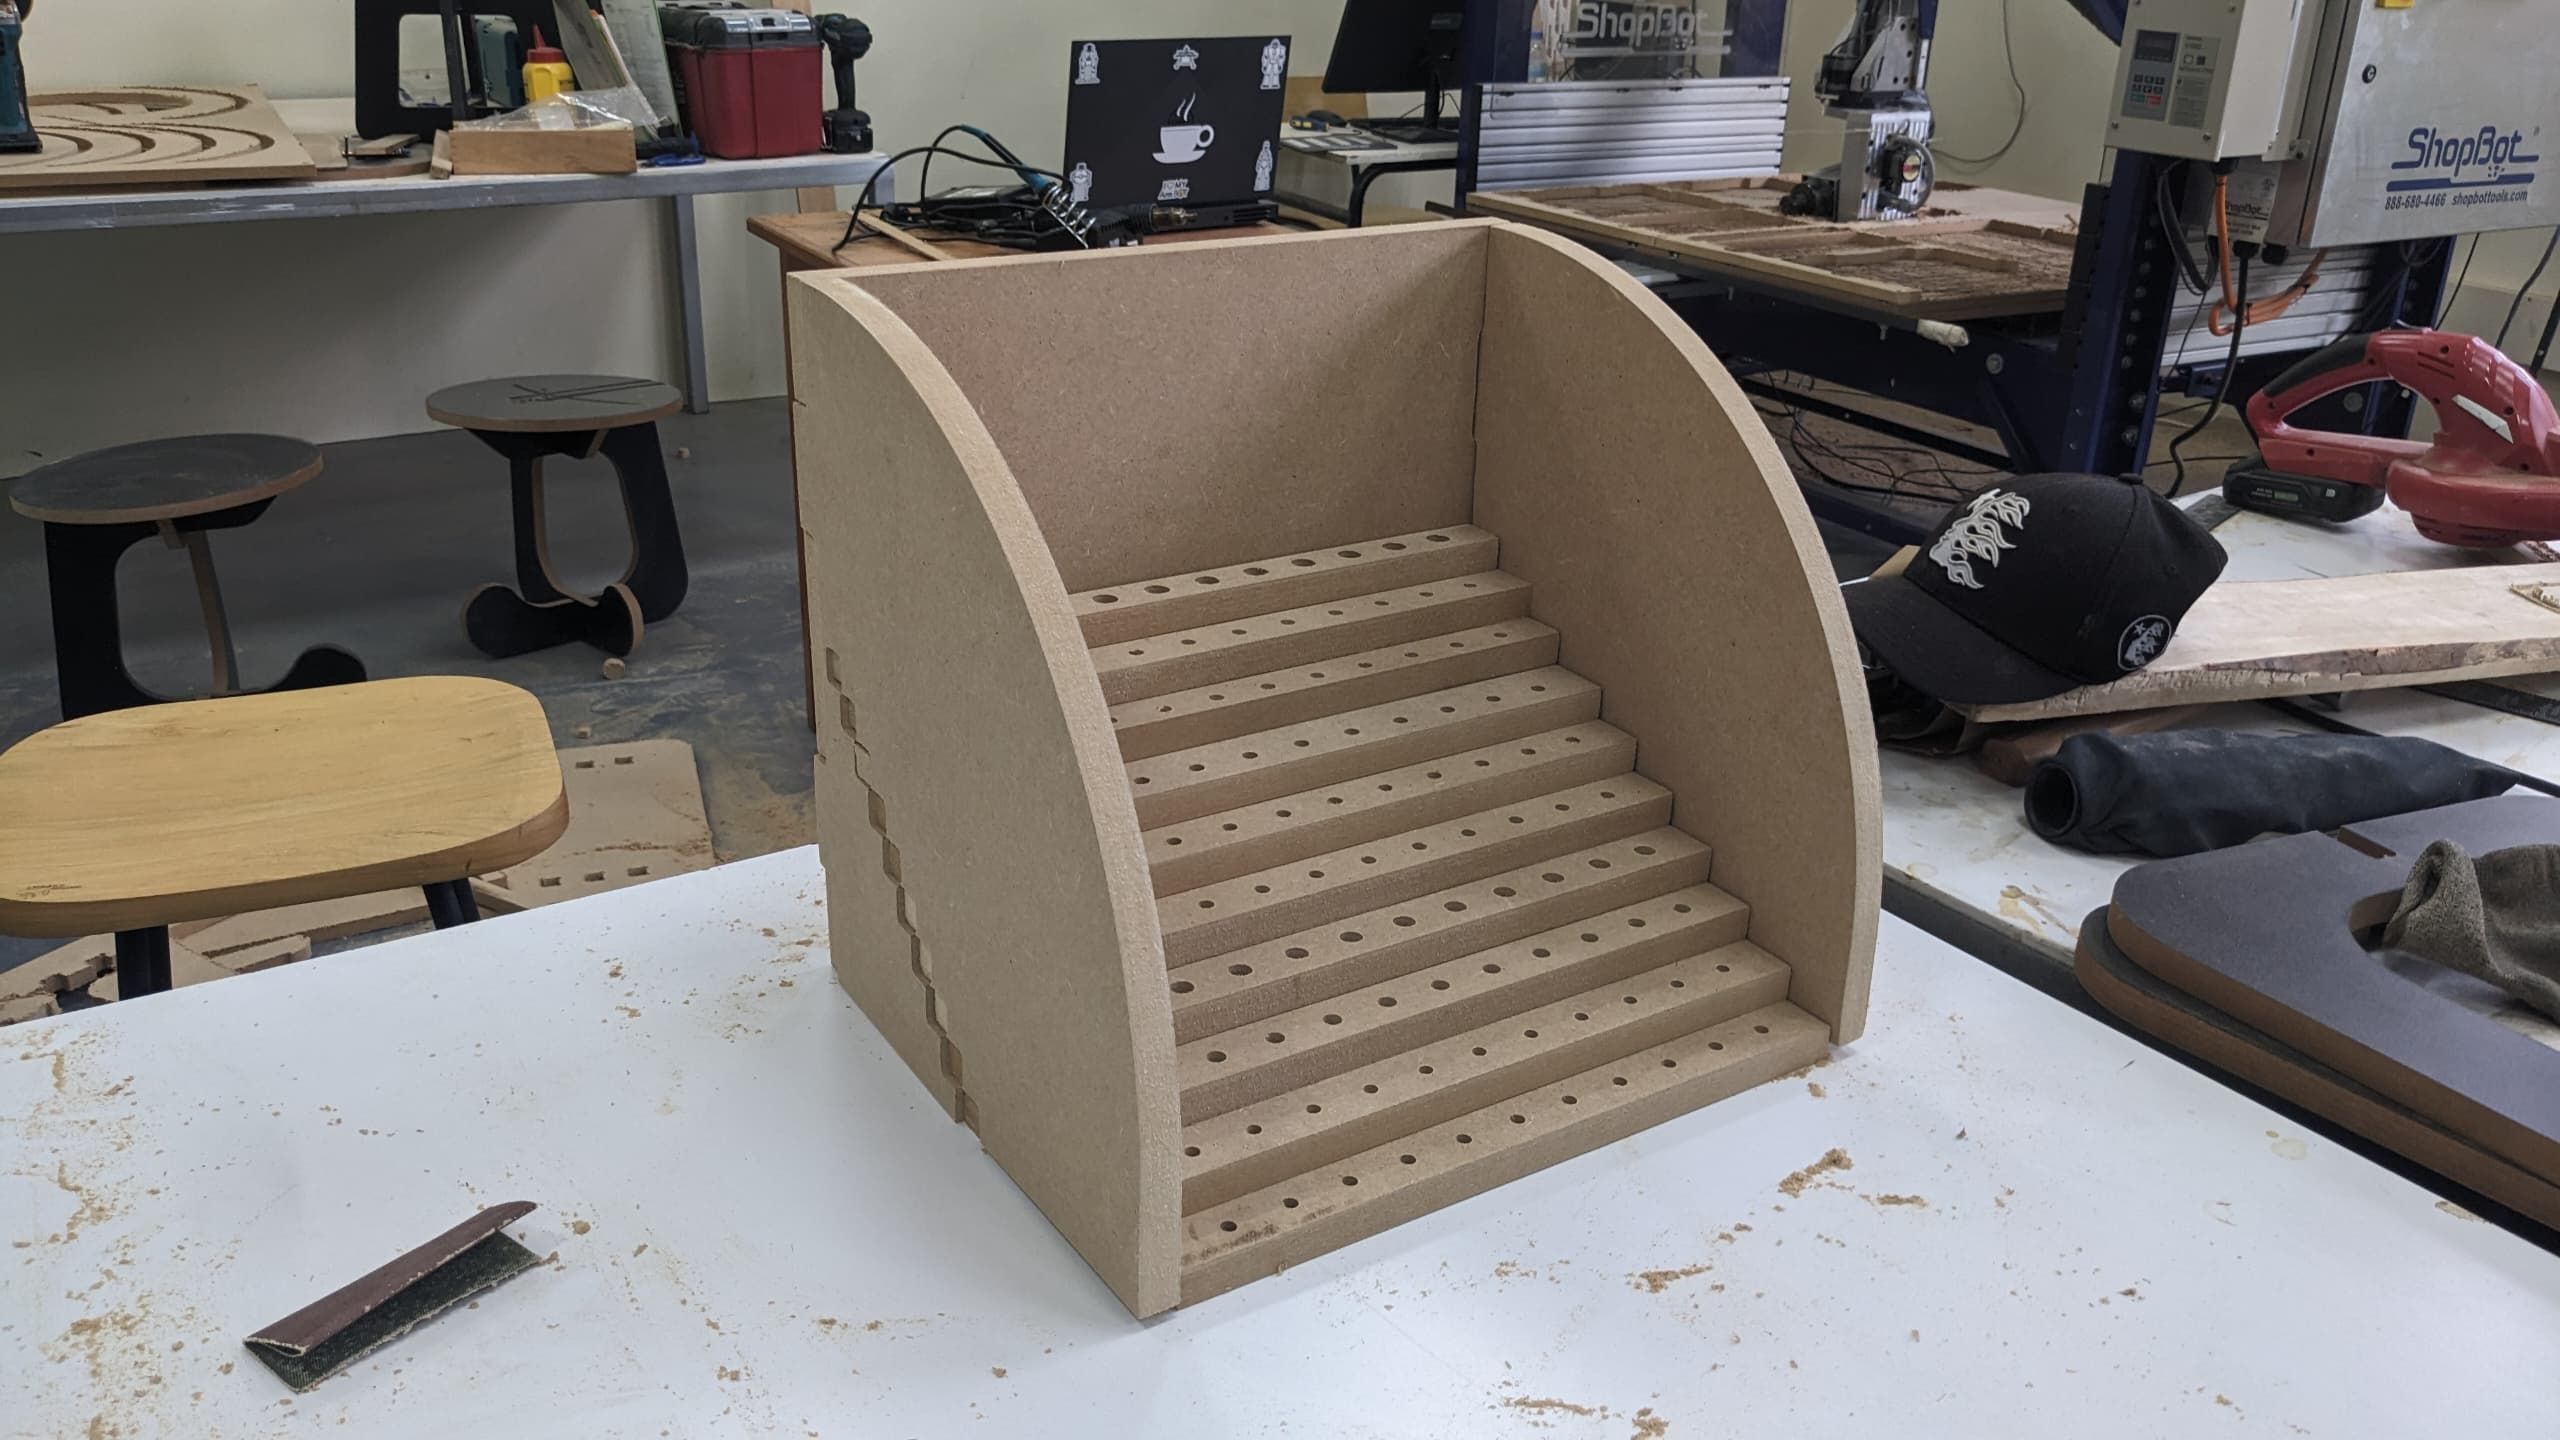
Once all the parts were cut, I sanded the edges and began assembly. I used finger joints along the sides for a strong interlocking fit—no screws required.
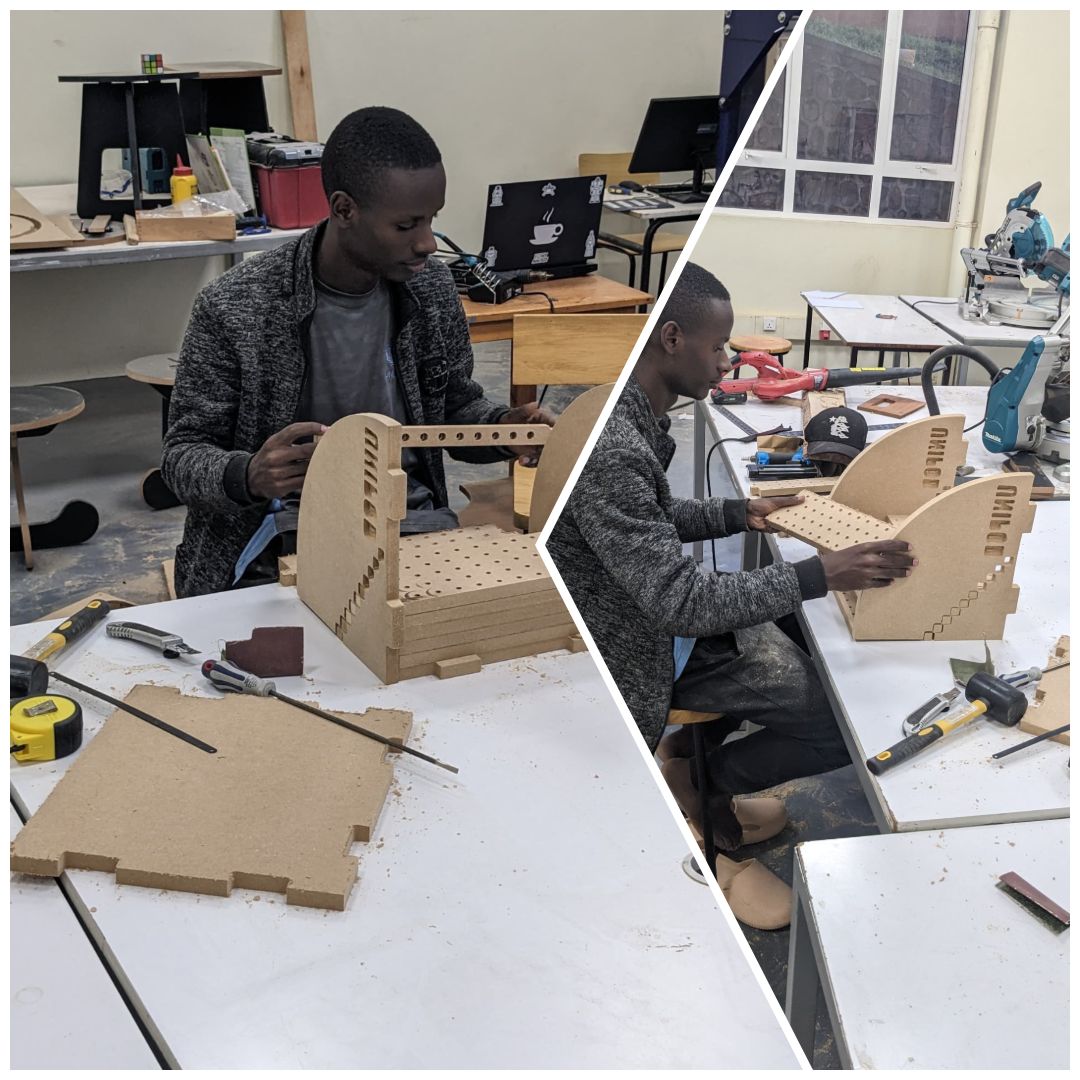
here is the output from my assembly
what I gained from this assignment
This assignment helped me appreciate how design and machining come together. Every part had to be planned with the machine's capabilities in mind. I also learned how crucial CAM software like VCarve is in bridging the gap between CAD and CNC.
If I were to do it again, I’d probably add a handle or maybe slots for labels to identify tool categories. But overall, I’m happy with how it turned out!
Here is the original file
-
All the design and machining files are available below:
original files for week 7